How to Import KML files in Hammer Hub and Hammer App
- Hammer Missions

- May 5, 2022
- 3 min read
Updated: Jul 18, 2022

Overview
With Hammer Missions not only can you create missions by using both the Hammer Hub and Hammer App but you also import already created KML Files.
So, what is a KML file?
A file with the extension .KML is known as a Keyhole Markup Language File.
KML files use XML to express geographic annotation and visualization by storing locations, image overlays, video links and modeling information like lines, shapes, 3D images and points.
Text courtesy of LifeWire
Most KML files are created with Google Earth or Google Earth Pro which subsequently can be imported into the Hammer Hub or Hammer App and then manipulated to suit your mission or mission type.
In this tutorial we will discuss how you import KML files into both the Hammer Hub and Hammer App
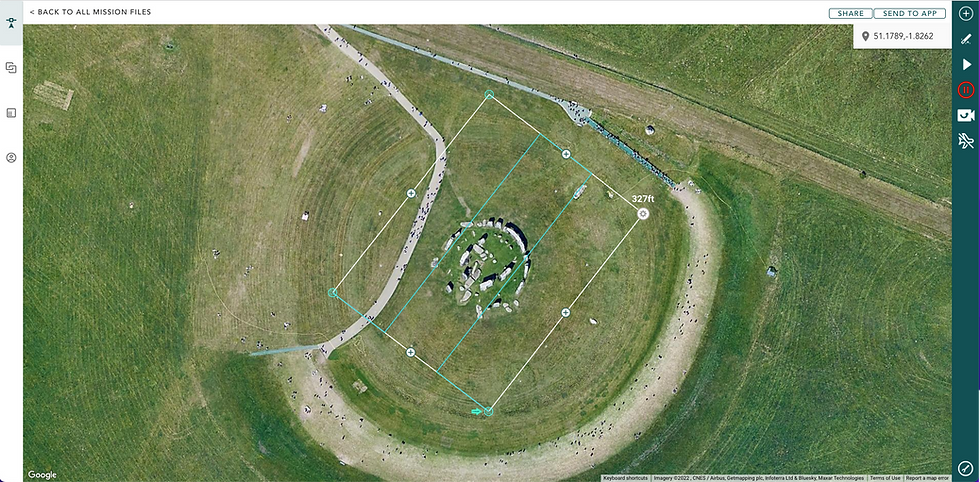
For the purpose of this tutorial we will be using a KML of Stonehenge created in Google Earth where we have drawn a box around the area we wish to plan our mission around. This will relate to our planning later in the tutorial.

Tutorial Videos
We have also produced a video on how to Import KML Files in both Hammer Hub and hammer App:
Hammer Hub
Hammer App
Tutorial
Importing KML files in the Hammer Hub
You may have been sent or created your own KML file. This would have either been downloaded or stored on your computer, make sure you know where the file has been stored so that you can access it when required.
Open the Hammer Hub and create a New File

Here we have created a new file named 'Stonehenge'

Open the newly created file and select 'Add task' in the top right hand corner, highlighted here in red.

Once you have selected 'New task' you will be presented with the available missions list, below the list you will see the option 'IMPORT KML'

Select the 'Import KML' hyperlink. This will open your file management system on your PC or mac, from here you can locate your saved KML file. In this example we have the file 'Stonehenge.kml'

Select the stored KML and open the file. Once you have opened the KML file you will be presented with the available module options.

Select the appropriate module for your mission, in this example we will be using mapping.

You will see from the above example that this has opened the file 'Stonehenge.kml' and placed the mapping markers on the map already. From here you can make the relevant adjustments as you would when planning a mission from the offset.
Importing KML files in the Hammer App
Open the 'Hammer App' and select the spanner icon in the bottom right hand corner to open settings, highlighted here in red.

Once the settings option has been opened scroll to the bottom and select 'Import' under the section 'IMPORT / EXPORT - Import KML / .mission file'KML File Import
When you have selected 'Import' you will be presented with an option to browse, as shown below.

Select the stored KML file, the example we will be using is 'Stonehenge'

Once you have opened the KML File you will be given your module options to use with the KML

Select the correct module for your mission. In this example we will be using the 'Mapping' module.
This will load the KML file with the mapping mission already loaded, from here you can make the relevant adjustments that suit your mission.

And that is how you Import KML files in both the Hammer Hub and Hammer App
Summary
In this guide, we looked at how to Import KML files in the Hammer Hub and Hammer App.
If you'd like to learn more about how to produce high-quality data and get the most out of your drone missions, please feel free to visit our learning resources.
If you haven't got a Hammer account as yet, and would like to try Hammer Missions you can get started on our free trial.
To learn more about our enterprise solutions, including mission collaboration, data processing, and AI solutions, please contact us at team@hammermissions.com.
We look forward to hearing from you.
- The Hammer Team


