Using Measurements in Hammer Missions | Drone Mapping
- Hammer Missions
- Nov 1, 2022
- 3 min read
Updated: Feb 2, 2024

Overview of Drone Mapping
Drone mapping has evolved dramatically over the past 10 years, from its infancy to the present day, the technology has advanced to a point where we can now not only create a 3D model from a collection of photos but take measurements from those 3D models.
Here at Hammer Missions, we have developed a method of taking measurements from 3D-processed models including distances, areas, and volumes.
In this post, we will be discussing why measurements are important in drone mapping and how to make those measurements using Hammer Missions.
Why Measurements Are Useful
Measurements from 3D models can work as a huge advantage, although these measurements are for reference only, they can give you, your stakeholder, or your client an indication of the distance, area, or volume of your measured target.
These measurements along with the 3D model can save time and resources when collecting data for surveys or inspections.
Collecting measurements of a structure can be a time-consuming, expensive, and often dangerous task when using conventional methods.
Using the data collected from a drone cuts down on all of these factors and gives you the results you need in a fraction of the time, enabling you to get estimated measurements from the comfort of your office or home once you have collected the data.
Making Measurements In Hammer Missions
Now that we understand why measurements are important we will discuss how you can make these measurements using Hammer Missions
Please note, measurements in Hammer Missions are to be used as an estimate only.
For these examples, we will be using our 3D model in full-screen mode which can be selected in the bottom right-hand corner of your 3D model.
Measurement Options for 3D Mapping
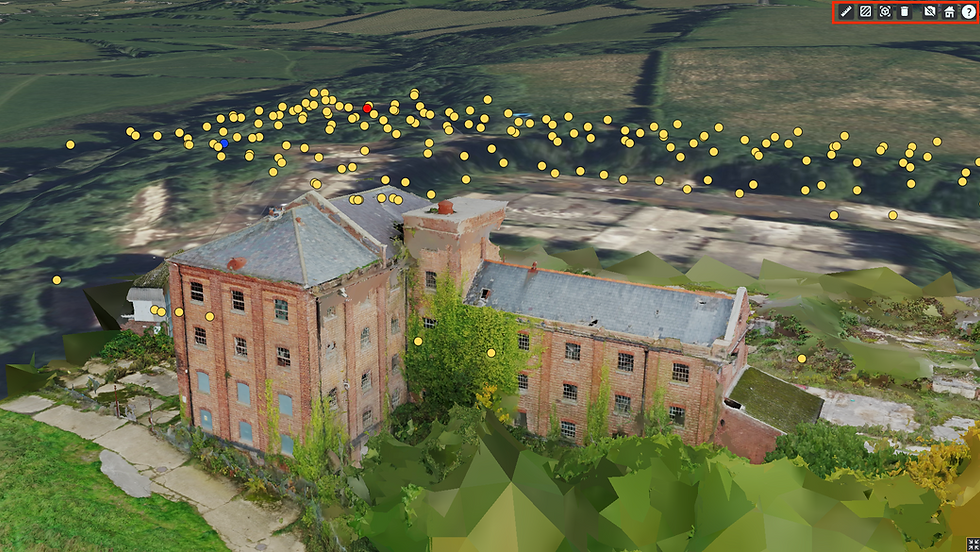
You will see in the top right-hand corner of the screen, highlighted in red, several options, below we will discuss what each one of these options does.

The first three options from left to right are measurement options
Optionally you can turn off the cameras (colored dots above the structure) to visualize the area uninterrupted. The cameras icon is in the top right menu as shown below:

1. Distance
By selecting the ruler icon you are able to measure distances, highlighted below in red

Select the ruler and then mark the areas you want to measure the distance of, press the tick icon or enter to show the measurements.
2. Areas
Select the area icon, as highlighted below in red, to measure the surface area.

With the area icon selected draw a polygon around the area you wish to measure.
3. Volumes
Select the volume icon highlighted below in red.

With the icon selected now draw a polygon around the area you wish to measure the volume of.
Depending on the size of the volume to be measured the processing can take some time to give you the measurement.
4. Deleting Measurements
To delete a measurement select the bin icon highlighted below in red

Now select your measured area and click either the blue line or the blue dot at the ends.

5. Sharing Measurements
All your measurements are saved in the project and you can now share these measurements with team members, clients or stakeholders by pressing a single button.
To learn more about how you can share your measurements and project data with others, visit our guide on sharing data projects in Hammer Missions.
Summary
We hope this guide has helped you understand how to Make Measurements Using Drone 3D Mapping With Hammer Missions.
If you'd like to learn more about how to produce high-quality data and get the most out of your drone missions, please feel free to visit our learning resources
If you haven't got a Hammer account as of yet and would like to try Hammer Missions you can get started on our free trial.
To learn more about our enterprise solutions, including mission collaboration, data processing, and AI solutions, please contact us at team@hammermissions.com
We look forward to hearing from you.
- Team at Hammer Missions
If you haven't already, here's how you can you get started with Hammer Missions.
